Showing posts with label tutorial. Show all posts

Monday, October 24, 2011

Scenery Tutorial: Coco Rocha

Hey everyone! It's been awhile since I made a scenery tutorial, so here's one for all you aspiring models.

This tutorial will focus on expression, the power of black an white, and of course, complex posing!

Our inspiration for today is:

 The amazing Coco Rocha!

The first step in making a good scenery is styling. You should keep your basic features (nose, eyes, face shape & skin tone) but expression is key! The two most important things in expression are the eye brows, and mouth. For this scenery I have raised my eyebrows, and chosen a slightly open moth to give a surprised feeling to the scenery:


Once you are happy with your expression, you must chose a background color. For this scenery I am planing to turn it into black and white in the end, so I don't want a white background like in the picture, because it will look to bland. The beauty of black and white is that it unites all the colors in your scenery, and makes certain things stand out. I decided on a grey background, because it adds contrast, but is not too dark.

Now we can begin posing! I always begin my poses with the head, so the first thing we must notice is the angle of the head.


We must also notice how the rest of her body is also tilted, in different angles.


The "T" shape shows her torso and shoulder span. As you can see the torso is at a slightly different angle than the head, but only by a little bit. Because it is such a small difference, I am going to keep the torso that is connected to the head, and just add different arms and legs.

Let's take a look at the angles of the arms and hands:


It looks like we're going to need 5 different body parts to get the correct pose. When putting together the pieces it's important to notice that each elbow is approximately a 90 degree angle. 

 
Now that we have 6 bodies total things are starting to look a little confusing. But by the lines, I hope you can see that I've lined up the angels pretty well. Now on to the legs! 

I think I will keep the leg on the left that is attached to the torso, because it is pretty close to the correct angle. So that means I just need to add 2 more bodies to form the legs. 


Now that we have all the parts we need, we must cover up the parts we don't need. Like so: 


Don't worry if it looks a little funny at first. Once you put clothes on it will look better. See: 


Then just a dd a few details for effect: 


Do you remember I said I wanted to make this black and white? Let's see how that looks.


Pretty cool huh? So how did this tutorial compare to the other ones? 

until next time,


Thursday, August 25, 2011

Possibilities

"There's nothing I can see, but possibilities..."

It seems almost every time I go to an event I leave with yet another lousy t-shirt. They're always too big, and the neckline is always way too high so that it's practically suffocating me. I usually just dump these shirt in my pajama drawer, and occasionally wear them from the safety of my home where no one can see me. However the other day I  received my senior class shirt (final year of high school!). This is a shirt that I am going to want to wear in public to show my class pride. But one look at the dumpy shirt told me that I was not proud of it. 

[Insert before picture here]
(Sorry I never took a before pic, so I'm working on getting a pic of my friends identical shirt...)

First of all they ran out of smalls, so it's one size too big, and secondly those necklines annoy me to no end. There was only one solution: t-shirt surgery. Normally t-shirt surgery is just cutting and tying, but I decided to take my sewing skills and see what I could do. I have to say I'm pretty pound of the end result!


Do you want to know how I did it? Here's a little tutorial on how to do it sewing by hand or with a machine. 

What you'll need: 

1 awkward t-shirt


Needle and thread or a sewing machine. (make sure the thread is the same color as your shirt. 

1 foot of thin elastic 

A t-shirt that fits you (for reference)

fabric scissors

a sharpie

at least 20 pins

Once you have all of that, you are ready to begin!

Step 1:                                               lower the neckline. 

-Cut off the collar, just below the seam that holds it on. 
-fold the raw edged in twice so that no raw edges are showing.
-Pin as you fold so that it will stay in place as you go. 
(If using a machine pin the needles so that they are diagonal across your fold.)
-Sew all the way around using a small stitch.
When you're done it should look like this:

Step 2:                                                             The sleeves 
-measure 2 pieces of elastic so that they fit around your arm
-Sew a wide (about 1/2 inch) stitch all the way around the sleeve in the place you want it to gather.
(if you're using a machine set your stitch wider, aka a gather stitch)
-Pull on one end of the string so that it gathers.
-Pull until it is the circumference of your arm and the same size as the elastic you cut.
-Tie the ends of the string together so that it stays gathered. 
-On the inside of your sleeve pin the elastic where you gathered the sleeve.
-Using a tight stitch, sew the elastic on. 
If you wish you can now remove the thread you gathered the sleeve with.
When you're done it should look like this:

Step 3:                                                 Making the shirt fit!

-Put the shirt on (make sure you've taken all the needles out!)
-Use the sharpie to mark where you want the empire waist to be.
-Take the shirt off and cut all the way around where you marked
- Set the bottom half aside. 
-Take the top half and turn it inside out.
-Place the shirt that fits you centered (with the shoulders lined up) on top of it.
-With your sharpie outline under the arms and down the sides onto your half shirt. 
-The sharpie line that you drew is where you're going to sew. 
with a very tight stitch!
Once it is sewn cut off the excess fabric so that it looks like this:
-turn right side out.
-Try on, if it is still too loose, repeat.
-If you find that the shoulder line is too low on your arms do a gather stitch across the seam on top of your shoulders. Pull until desired length is achieved, then tie string in knots.
It should look like this when complete:

Step 4:                                                      The final step!!
-Gather stitch the top of the lower half.
-Pull until it is the same size as part you cut it from, then tie knots.
-Turn inside out and put around top half so that the sides you want to sew together are touching. Like so:
-Pin together, then sew with a very tight stitch .
-Sew to the opposite side of the edge so that when you flip it over your gather stitch does not show.
-Flip it over: and voila! you're done (:

Questions?
Would you like more sewing tutorials? 

Are you going to try this one?


Friday, June 17, 2011

Complex pose tutorial (:

Well I'm on summer break, and so it seems I have a lot of extra time on my hands! I decided to make that time productive, by making a scenery/posing tutorial for you all!

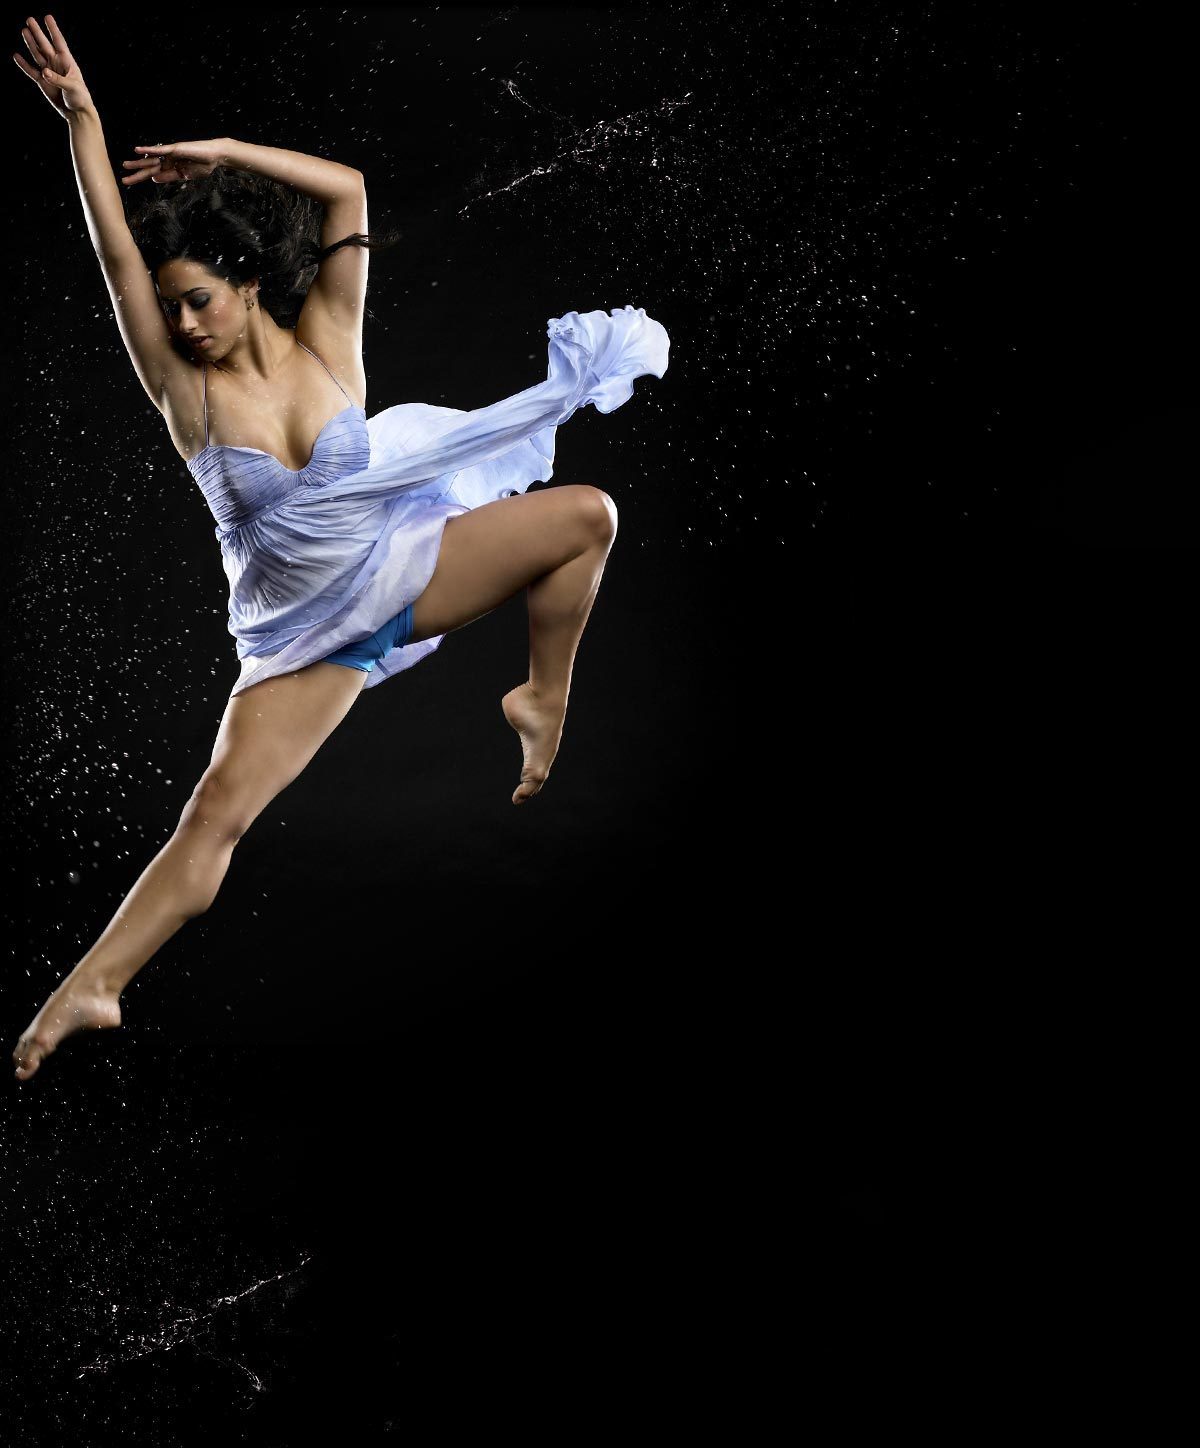
Today's inspiration is this photo of Jeanine (my middle name, hehe) Mason, Season 5 winner of America's "So You Think You Can Dance".


It's a really stunning pose, so I though I'd give it a try. The first thing you need to notice is the angle that the body is at in relation to the picture.


Try to angle your medoll accordingly
 

The next thing to do is add in the arms. We will need 4 extra body parts to do that. In the picture below you can see that each line represents a new body part.


Add them in like so, and I drew handy lines so you can tell which parts we're "keeping".  


After you do that, it's leg time!  You will need 3 more body parts for this, making a grand total of 8 bodies needed.


For the legs it's very important to pay attention to the angles. In relation to the "original" body, and to the other parts of the legs.


Now this is the tricky part: covering everything up. I really can't show you "how" I covered everything up, cause it's not really something you can teach. Just don't be stingy about how many tiles you use, and you'll be fine. Always remember to rotate and change the size of them as needed.


Now I put some clothes on her, and added horse hair for motion:


And then you add ATMOSPHERE. The second most important thing in a scenery (:

 And this video is of Jeanine on the show, with her partner Jason. I love this video, and it was my other inspiration for this scenery. I find that listing to music while I make a scenery helps convey more emotion. 

So here it is for your enjoyment (:

I hope you liked this tutorial! If there is anything you would like me to focus on in another tutorial just let me know! I hope to see some "beautiful comments", hehe (:

Wednesday, May 4, 2011

Posing: The Basics

It has come to my attention some people would really like to know the bottom line basics of posing. Well Fear not, I am here to make wishes come true.

So first and foremost you must know how poses are created. They are made by using multiple bodies strategically placed, to create a "pose". Once all the bodies have been laid out, there will be parts that you don't need, and those will be covered up. If you are a superstar the easiest way to cover things up is with "tiles". Now here is what I mean by that:


Tiles are simply "posters" that you make in the star bazaar that are all one color. As you see above they are 4 stardollars and for ss only.

So what do non ss do? They have to use more creative things, are are more limited on the colors they have. For more info on non ss posing please see my tab up above (:

Well I hope this cleared some things up for people, and if you have any other questions please ask in the comments!

Tuesday, April 26, 2011

Complex Pose Tutorial (#3)

It’s been quite some time since I did a scenery tutorial so I decided to do one (:

Today’s scenery will be inspired by this photo:


For this scenery we’re going to start out with a black background.


The first thing we must determine is what angle to place the head at. I drew a line on the picture and my doll to help figure this out:


On the picture you can see the line is about a 45 degree angle, so then I just had to rotate my doll until it was also at the same angle.


Then I moved my doll to the center of the scenery, because having symmetry always makes a scenery look better.  So now we’re going to work on her left arm. The first thing you should notice about this arm is how close it is to her chin. The next thing you should notice is the angle of her arm. 


Taking these things into account, the arm should be placed like this:


Now we place another arm in to bend it like this:


Now we move on to the right arm. 


When doing the first part of this arm you have to be careful that the head does not overlap the left arm: 


Now this is where it gets tricky. It’s really challenging to put the last part of the arm in place with out covering the other parts that you want. So I put the arm down a few layers, but I had to keep it above the first part of the left arm (or else it would go behind the other head). 


This is a sacrifice I had to make, but it is easily blended in. Now I have to cover up everything I don’t need. Let’s take a look at what I do need:


Keeping in mind what we do need, I’ll cover up what we don’t need. 


Now I am well aware that this does not look to fab, but once your put clothes on it’ll look a lot better (:


Now for complex poses it's best to use objects as clothes, like I did above. Now just add a few items, maybe tying in a theme, and a tile:


 "If only we had more time..."

And tada! you're done!  I hope you enjoyed this tutorial! How did it compare to my previous ones?